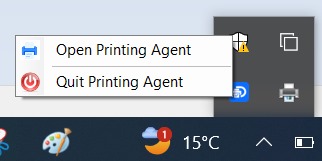
Desktop printing agent
⚙️ Configuration Steps
- Open the Branches page and select the branch you want to set up.
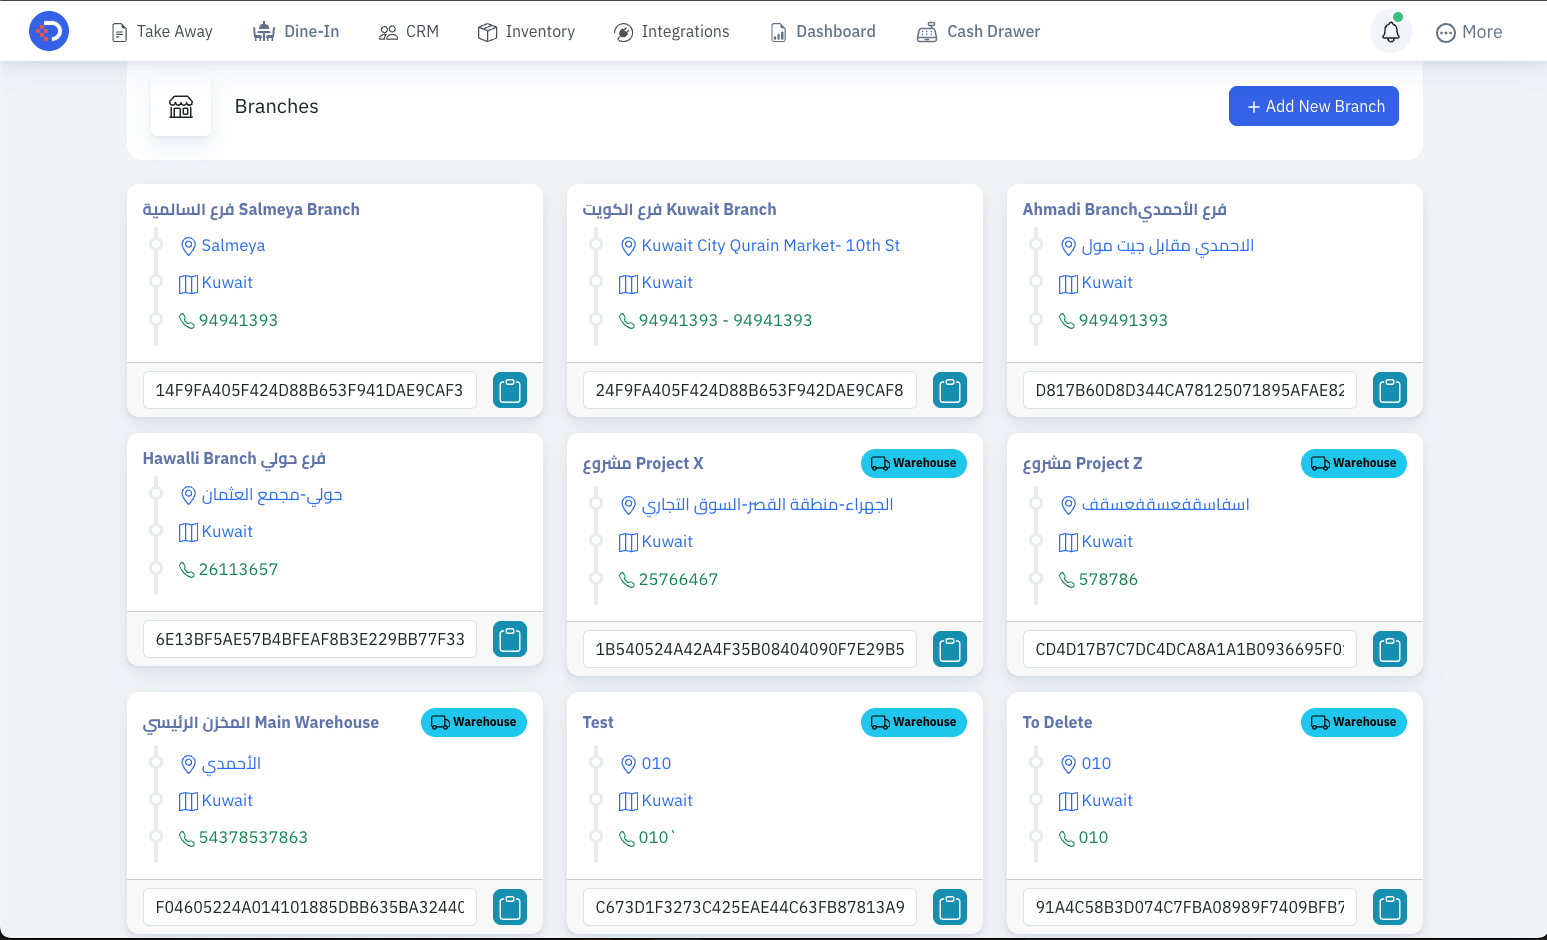
-
Go to Printing Settings.
-
Add an Invoice Template
- Choose how many invoice templates you want to use.
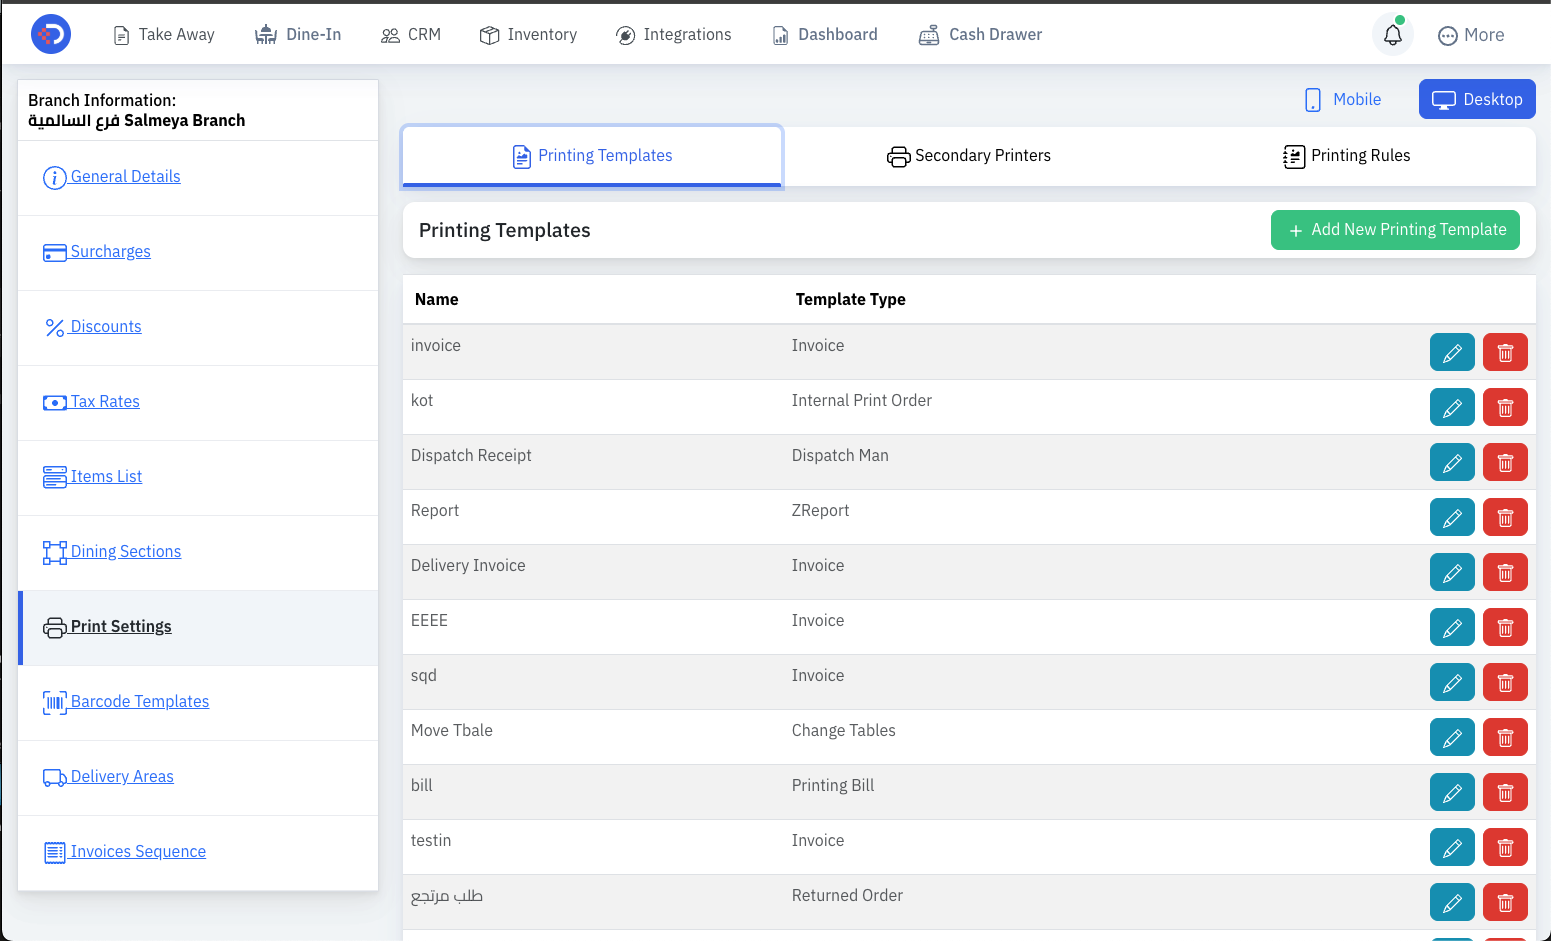
-
Open the Secondary Printers tab.
-
Add Secondary Printers
- These are virtual printer names that will be linked later in the desktop app.
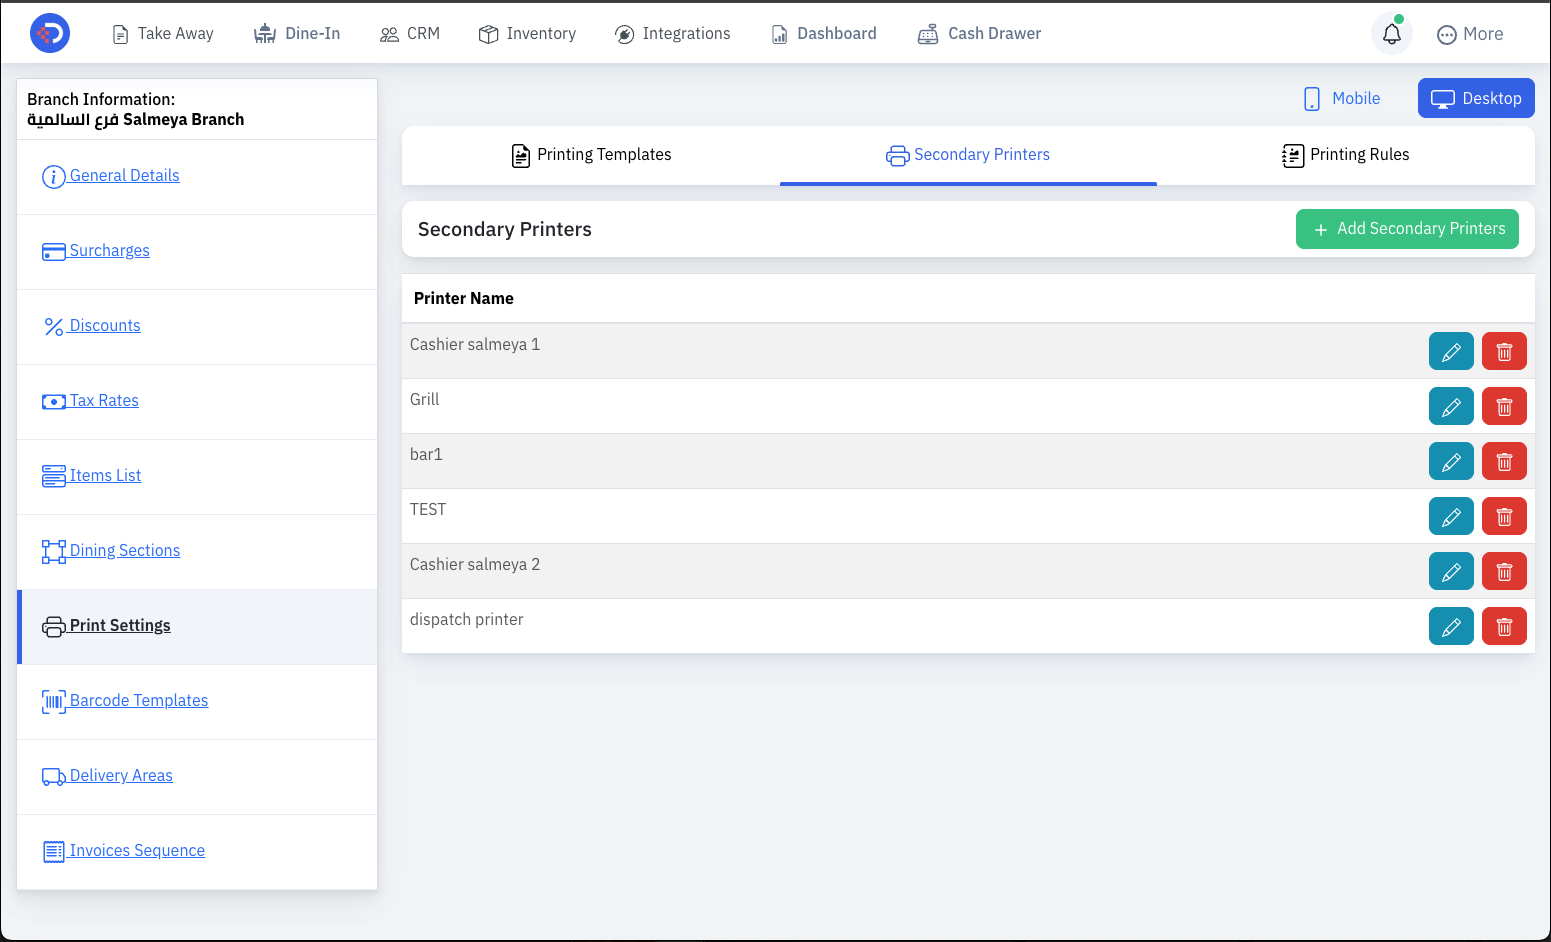
-
Open Printing Rules.
-
Assign each Invoice Template to the Secondary Printer you want it to print on.
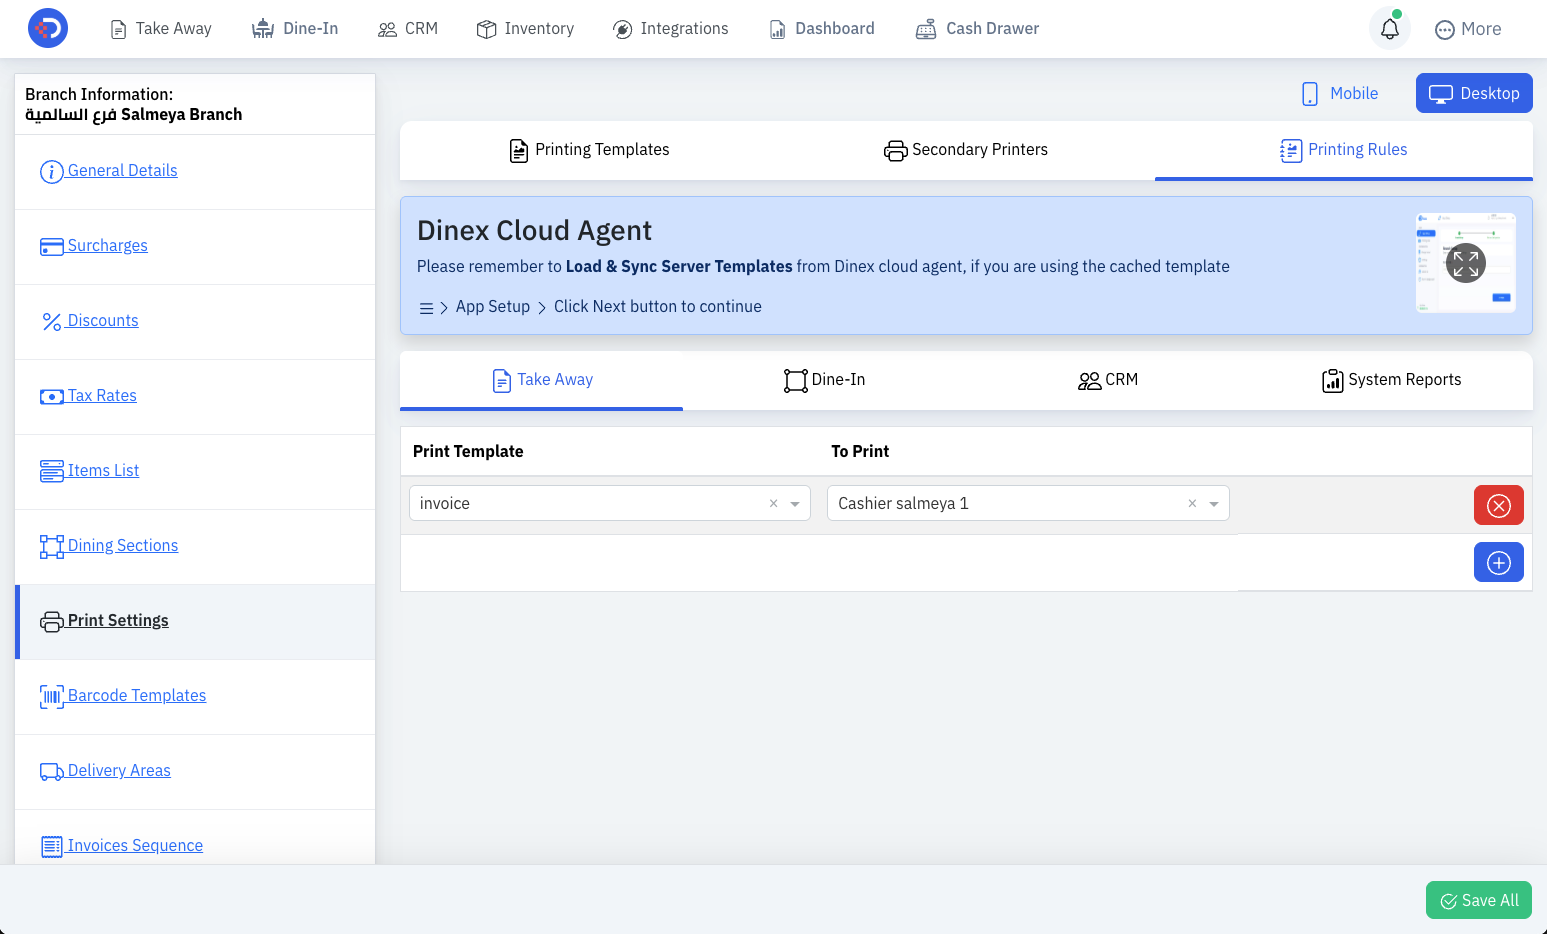
Once completed, your printing setup will be ready to use.
🛠️ Installation Steps
- Download the latest version of the desktop app from the Releases page.
- Install the desktop app on your device.
- Open the desktop app.
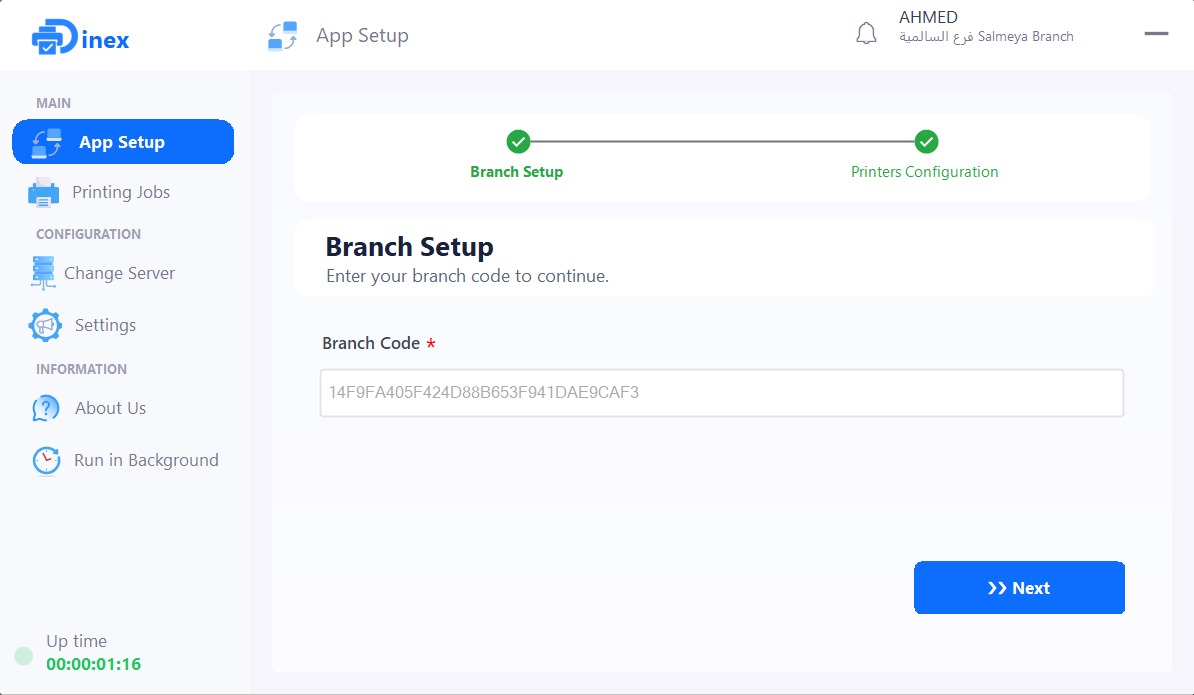
- Open the Branches page in your Admin Panel.
- Copy the Branch Code.
- Paste the code into the desktop app.
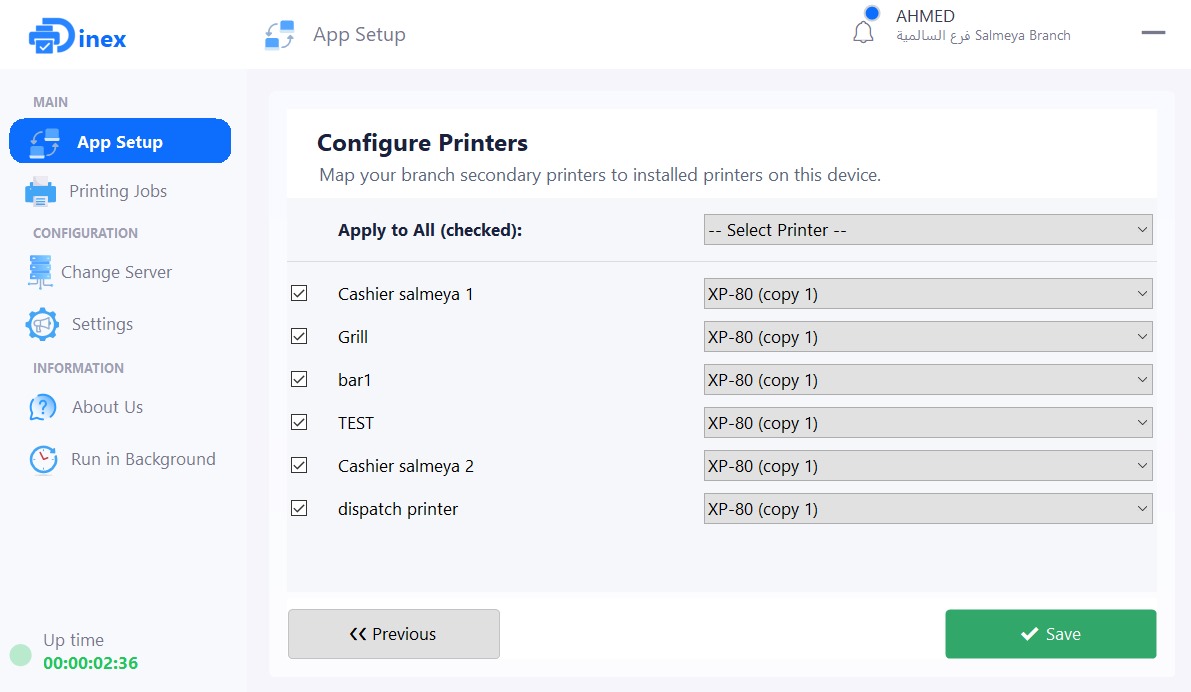
- Map printers in the desktop app
- Check the checkbox for the Secondary Printer you want to configure.
- Select the physical printer installed on your device.
- Repeat this for each secondary printer you need.
- Click Save to apply the changes.
 8. 🎉 Congratulations! You can now start using the app.
🧾 How to Change Receipt / Invoice Settings?
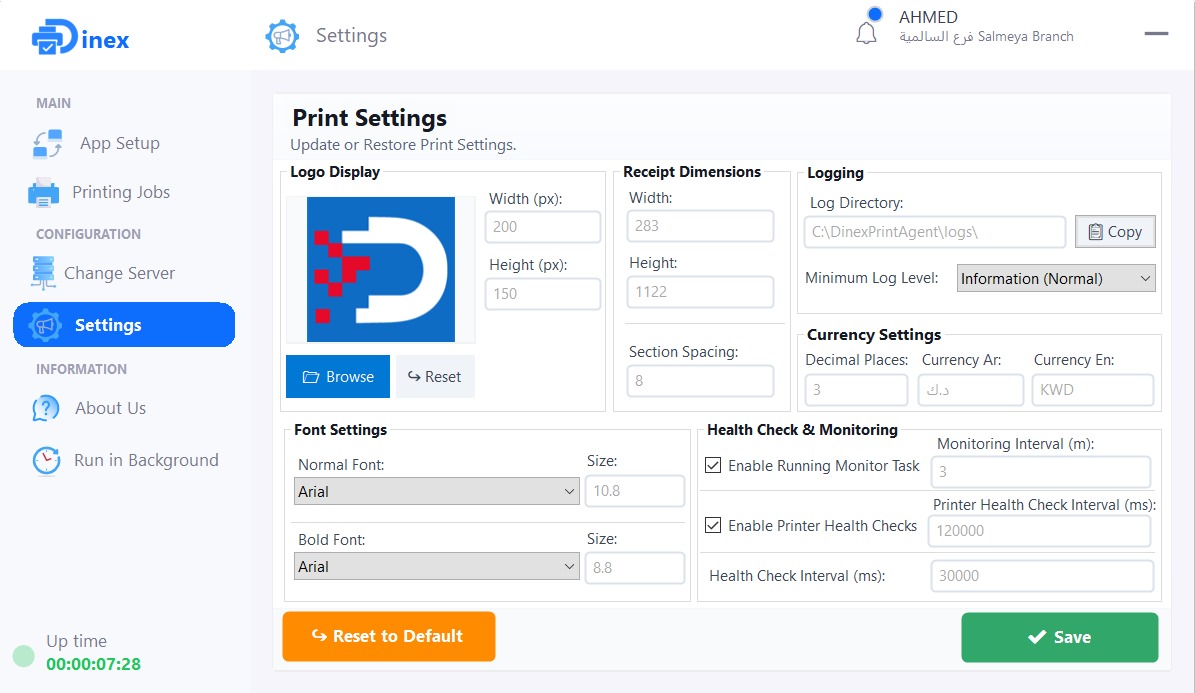
- Open the Print Settings page.
- Change the Receipt / Invoice Settings you want to change.
- Click Save to apply the changes.
➡️ 🖥️ How to Close the Desktop App When It’s Running in the Background?
The desktop app runs in the background.
To close it completely, find the app icon in the Windows system tray (menu bar), right-click on it, then select Quit Printing Agent.